Learn. Choose. Change.

I pledge to learn the true cost, to people and the planet, of what I eat, wear, drive, use and do every day. I choose to consume justly and to increasingly change my habits.

Tuesday, November 13, 2012

Just Sew: Honeymoon Hat

Woo-hoo!  I made the big time and am posting a tutorial over at Project Run and Play today.  All month they are featuring bloggers from their sew along group in Flickr.  I've been working on these fun hats to sell at the textile collective over the holidays.  They are based on a felted wool hat I picked up on my honeymoon seventeen years ago this month.  Be sure to check out my tutorial plus all the others this month.

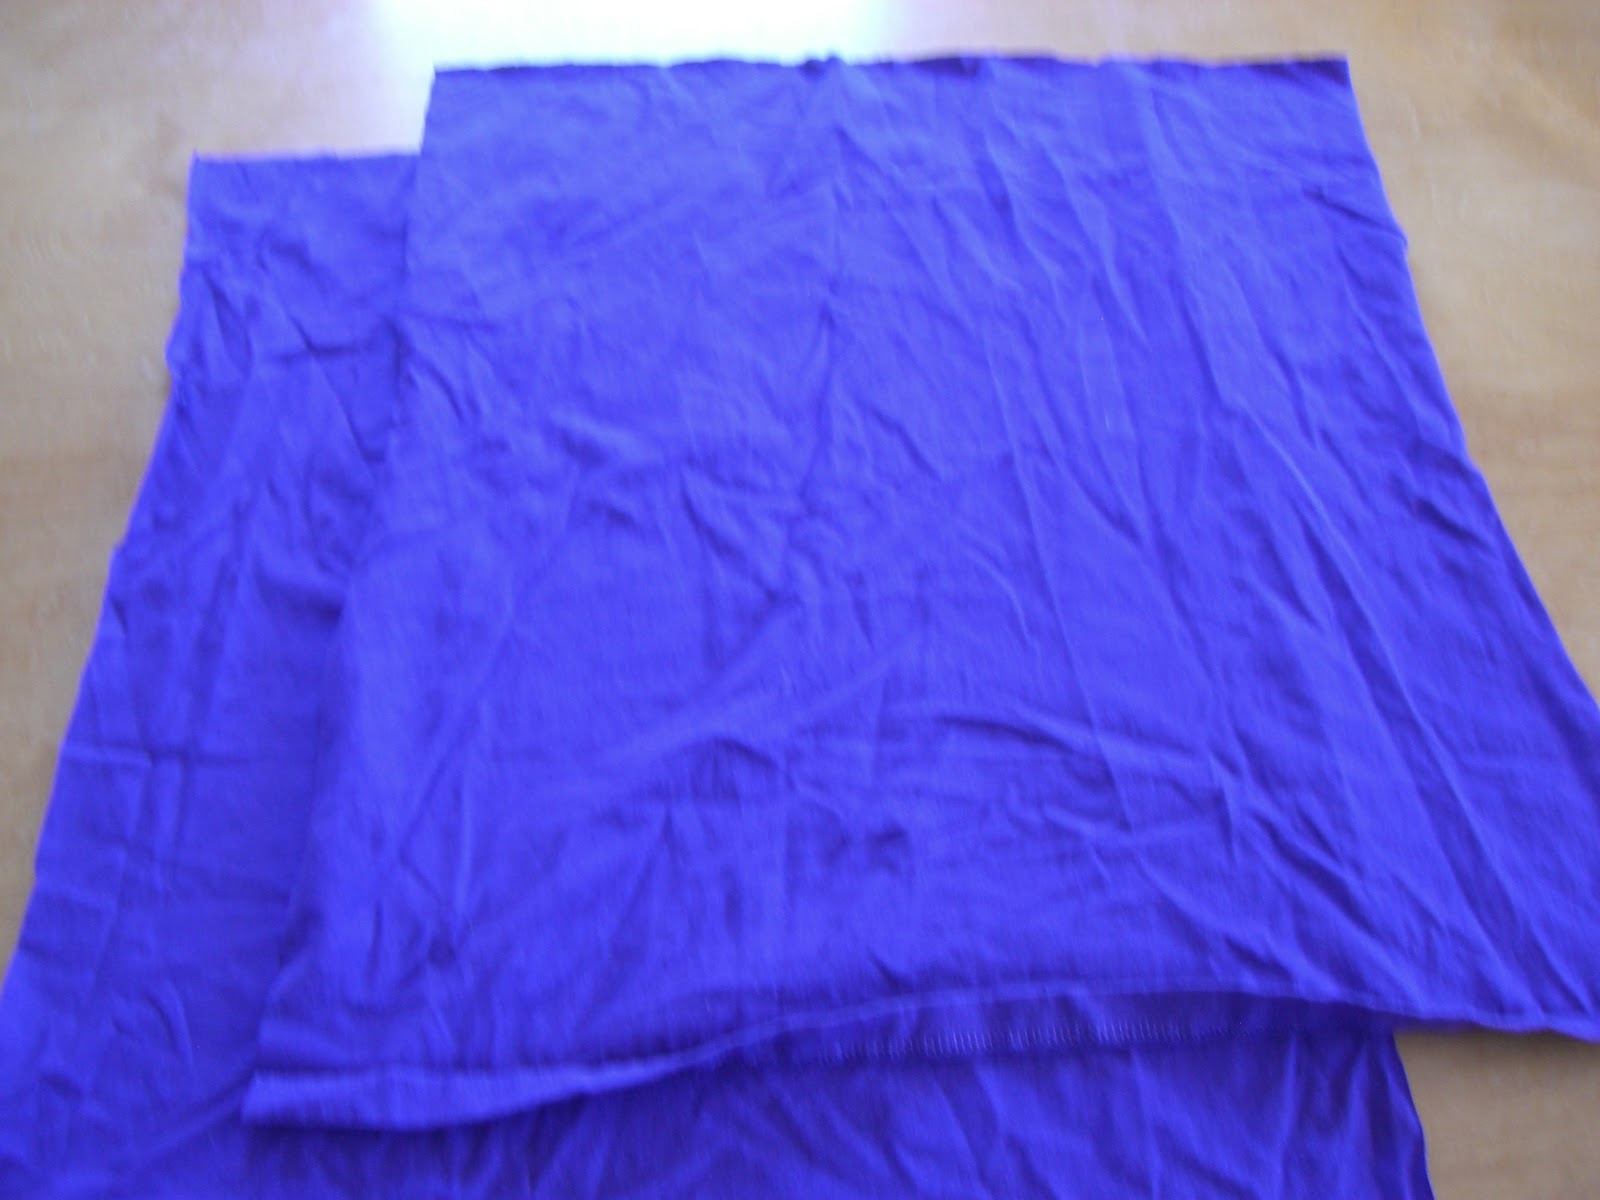
This tutorial features a hat made from t-shirts, but the same pattern works for old sweaters, sweatshirts, and fleece.  I have also experimented with some groovy suit fabric, but it doesn't have any stretch and I haven't developed a consistent pattern for it yet.  So, after you have settled on some fabric with some stretch, you are going to cut out panels for the main part of the hat.


For a hat sized 0-2T cut one 5x6" and four 3x6" rectangles (five panels total) and one 6" circle.

For a hat sized 3T-7 cut one 5x7" and four 4x7" rectangles (five panels total) and one 7 1/2" circle.

For a hat sized 8&up cut one 5x8" and five 4x8" rectangles (six panels total) and one 9" circle.
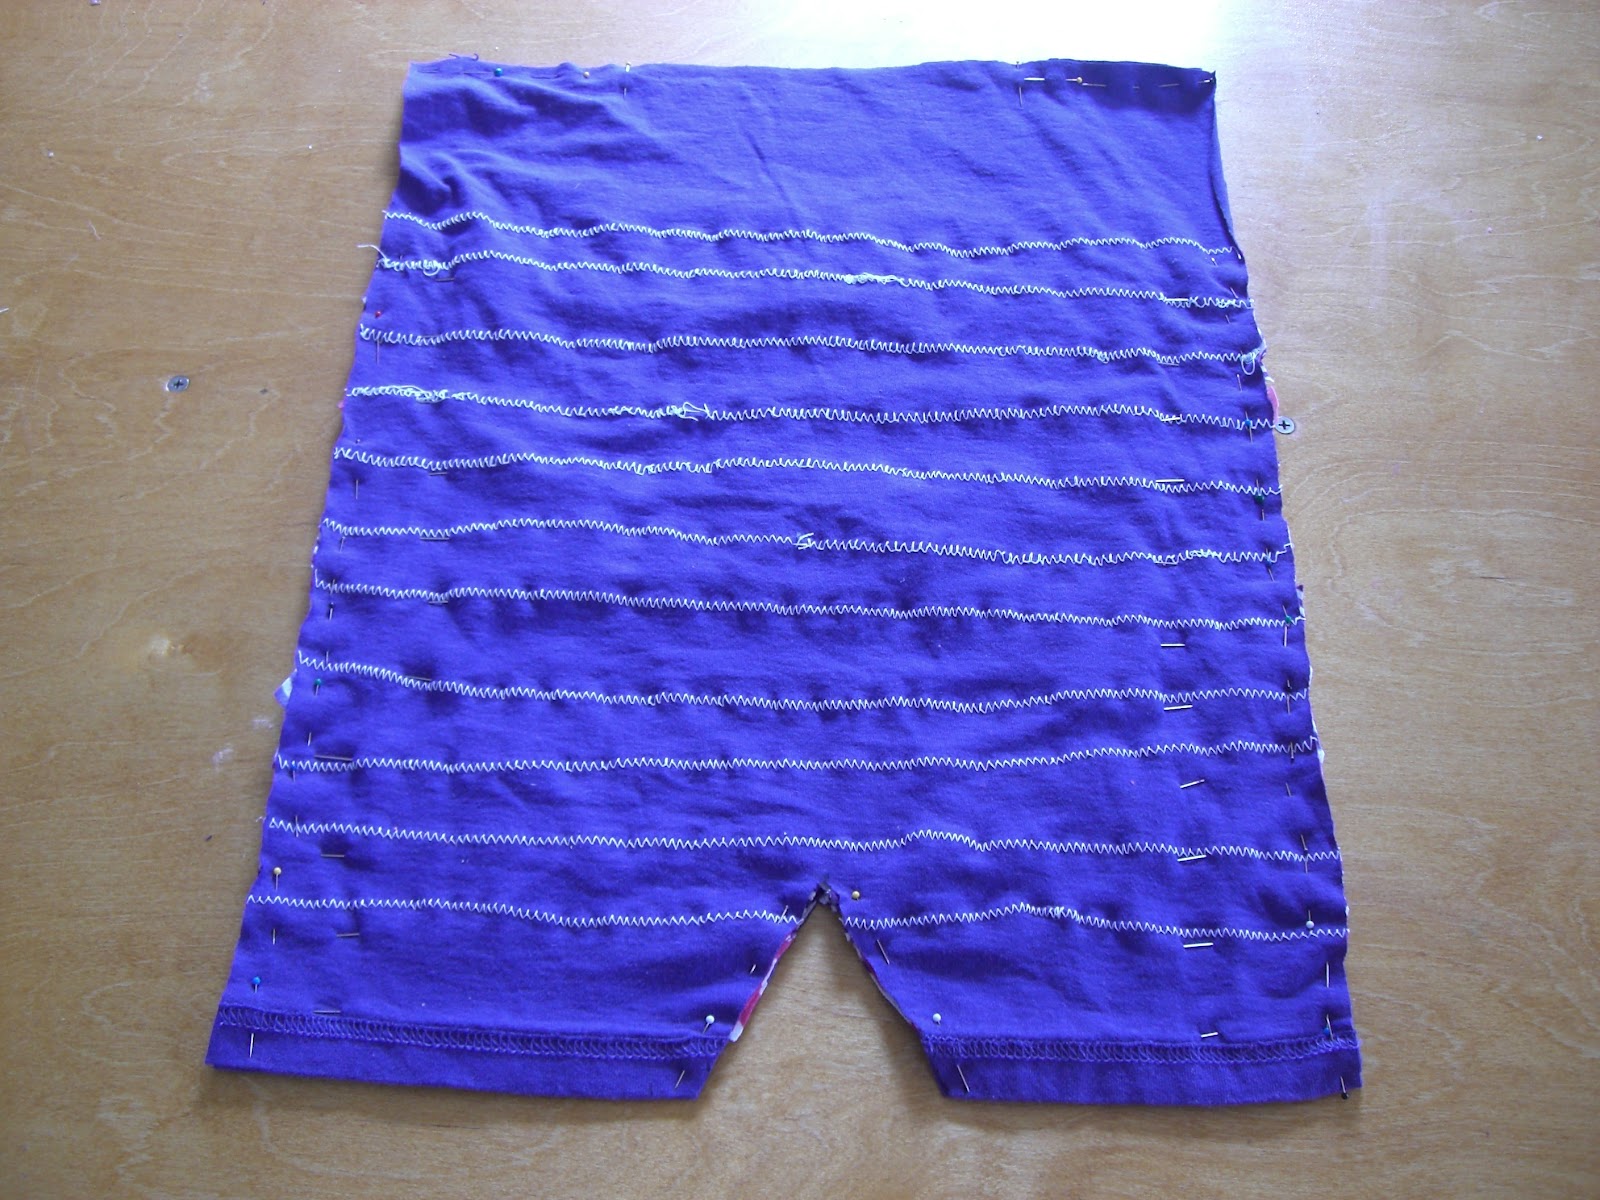
Pin and sew panels together (if your fabric has a right side, do it right sides together) creating the body of the hat.  When pinning, take care to line up the tops of the panels that will eventually be sewn to the circle to form the crown of the hat.  It does not matter if the bottoms of your rectangles are uneven, as they will just get folded up into the brim.  Many people feel you can only work with knit fabric if you have a serger, but a zig zag on top of a straight stitch is really just as effective.
 You can now pin the circle to the hat.  Turn the body of the hat inside out and begin pinning the edge of the circle to the tops of your rectangle.  I sew around first with a straight stitch, and then go back over it with a zig zag to give it a little more structure.

 Flip the hat right side out and finish with another zig zag around the exposed crown of the hat.  This step is optional if you like the shape of the hat without it.  Again, I like the structure it adds to the hat.  These sew up pretty quickly (30 to 45 minutes) and although the original Honeymoon Hat shows no signs of wear and tear, it will be nice to have some different color choices.

Monday, November 12, 2012

Just Sew: Potholder Covers

I have been using the same ratty potholders for years, embarrassed of them when we have company or when I use them to take a dish someplace else.  At one point, I tried using a piece of a heavy wool sweater that had been felted as a potholder, but the heat still seeped through and they did not provide enough protection.

You can probably guess where this was going, but it took me a lot longer to figure it out.  I simply sewed slipcovers for my ugly old potholders out of a felted wool sweater.  It was so easy!  I cut two squares a little larger than my potholders, placed the potholder in the middle, and sewed them together.  I like the exposed edge, but one could turn them inside out after sewing and finish them that way.
They are so cute now!  I chose a colorful striped sweater so I have a lot of coordinating color choices for the other two potholders that are left.  I can't believe it took me as long as it did to figure it out,  but now I am so glad it's done.  I can't wait to show them off at Thanksgiving.

Just Read: Making It

During my last year as an independent bookstore owner I was fortunate enough to meet Erik Knutzen and Kelly Coyne, authors of Making It:  Radical Home Ec for a Post-Consumer World.  Based in the middle of Los Angeles, they have created a lifestyle that evokes Ma and Pa Ingalls of the Little House books.  They grow their own food, raise their own meat, bake bread almost everyday, and create much of what they need from scratch instead of buying ready-made products.  Ironically, when I picked them up at the ferry terminal to take them to their author event, upon seeing my sewing machine in the back of my car (I must've been giving a lesson that day) they commented they still weren't sewing their own clothes, but it was definitely a goal on their list.

They are part of the Radical Homemaking movement where people take a hard look at their lifestyles and try to rearrange things in order to become producers, rather than consumers.  Shannon Hayes has been chronicling this movement for several years in essays, books, and her blog.  She, like Erik and Kelly and many others, came to the conclusion that they worked forty hours a week just to consume.  They then took the leap and scaled back on their traditional jobs to allow more time to produce and found, in many ways, they were better off, financially, spiritually, etc.  This lifestyle holds a lot of allure for me, and fortunately, our location and situation in life will allow us to pull it off.

That's where Making It becomes such a great resource.  Erik and Kelly worked with the publishers to make the book very accessible and not overwhelming.  Tasks are divided into sections:  Day to Day, Week to Week, Month to Month, and Season to Season.  The reader can tackle one thing at a time, incorporate it into their lives until it becomes part of a routine and then add another.  Topics range from creating hygiene and cleaning products, to gardening, to food preservation and more.  I am still checking off most of the Month to Month tasks, but really like their "recipes" for household products.

Although our family is most likely several years from being able to completely embrace this lifestyle, I do enjoy the sense of satisfaction we get now from the food we do manage to grow and eat, the eggs we collect, and the other items we choose to make ourselves rather than purchase at the store.  And, hopefully, as our children grow up and start their own households, producing will be so normal for them they will not get caught in the trap of consumerism.

Saturday, October 20, 2012

Just Sew: Alice in Wonderland Collection

Earlier this summer I agreed to be the featured artist for our local textile collective's First Friday show in October.  Since then I unexpectedly took a full time job at my kids' school which included hours and hours of commuting and training off-island.  Nevertheless(!!!) I was able to deliver my collection in time for the show.  Each look was inspired by a character from Alice in Wonderland.  Each look also did double duty as a sew-a-long entry for Project Run and Play.  Thankfully, I worked two weeks ahead of PR&P's schedule to finish in time for First Friday.  If I hadn't, I would have once again been unable to submit entries for the last two weeks as my life went into super-crazy mode (now I'm just in kinda' crazy mode).
 The photo shoot was hastily done on the one evening my models and I were all available the week of the show between school and sunset.  Even then, our little Cheshire Cat would only crawl (like a kitty, of course!) and had to be photographed separately, anyway.


My son can't wait to wear the t-shirt and blazer to school.  Meanwhile, his younger sister claimed the mini top hat. 

My favorite shot from that evening.  The sunflowers are so tall it reminded me of Alice being in the garden with the talking flowers.
The collection on display inside the textile collective.  The available space was smaller than I thought and I only put out a tiny portion of my personal Alice collection of books and other items. 
Although I did not put some finishing details on two of the looks and cut one out entirely (Tweedle Dee and Tweedle Dum)  I am so pleased I was able to complete what I did, both for the First Friday show and for Project Run and Play.  I tried some new techniques and feel I have become a stronger sewer in just two months.  I am grateful for both opportunities and look forward to the next challenge around the bend.


Thursday, October 18, 2012

Just Watch: SNL TechTalk iPhone 5

Every once in a while the American public is made aware of the millions of people who make our stuff.  Usually it is through disturbing news like the suicides at Foxconn or the rioting in South Africa.  Last weekend Saturday Night Live managed to put the workers in the spotlight and provided a little perspective when it comes to our expectations regarding new gadgets versus the reality of the workers' lives.  And although we laugh at the sketch, it still puts this topic in the mainstream consciousness.  Hopefully, some people will think twice and do their research once they're done chuckling.

Thursday, October 4, 2012

Just Use: Remnant Fabric

As Project Run and Play draws to a close this month and my Alice in Wonderland collection goes on display tomorrow night, it is time to turn my attention to some sewing projects around the house.  We have been in our home for a little over a year, and although we accomplished some pretty major renovations (knocking out two walls, new flooring, building a peninsula in the kitchen) my husband and I are both feeling inspired to get back at it again.  This winter we hope to finish painting, tile the backsplash, install countertops, and paint the kitchen cabinets.  We have also determined our north facing windows need window treatments after all.  It has been tempting to leave all of our windows exposed to keep an illusion of openness despite the small square footage of our house, but we need a little more privacy and a way to block some neighboring light sources on this side of the house.

In order to keep the lines as clean as possible I am making Roman shades.  Normally, I would have checked at the Pacific Fabrics Outlet on 4th in Seattle for any great deals on remnant decorator fabrics.  Unfortunately, they switched this store to a regular retail location earlier this year and I am not sure where their remnants end up now.

So, I have been researching sites dealing specifically in remnants online.  The two I am most excited about are Modern Fabrics and Warehouse Fabric, Inc.  Both have a pretty wide selection of home decorator fabrics that you can buy in yardage (as opposed to precut one-yard samples).  Also, both are reputable and carry recognizable lines of fabric.  Initially, I looked on ebay, but it was difficult to wade through the choices and none of the sellers instilled confidence in case I did not like my purchase.  I find it intimidating to buy fabric or other textiles online without having seen them in person first.  The color might be off and the weight or texture might not work with your project.  Warehouse has a blanket 30 day return policy and Modern considers returns on a case by case basis.

Although the majority of textile waste comes from the garment industry, it certainly exists in every area that produces fabric.  Both sites are run by married couples, and James and Ewa at Modern Fabrics are very pointed about the environmental impact you can make by choosing to use remnants.  If all goes according to plan, I should be posting soon about my purchase and my finished shades.

Wednesday, October 3, 2012

Just Sew: Boy's Week

With two girls and one boy, I definitely find myself more inspired and motivated to sew for my daughters.  Boys clothes do seem more technical to me and it is hard to make them look cool and not too cutesy and homemade.  Project Run and Play usually incorporates a boy's look challenge into their seasons and this is it.  This week I went with a pretty simple look, dyeing the sweatshirt blazer I made for the Fashion Icon challenge purple and adding some wide "piping" (made from a black t-shirt) for the trim.  My favorite way to dress up a boy is to put him in a t-shirt with a tie applique (using my easy applique techniques found here).  Although these two items will pull double duty this month as the Mad Hatter look for my Alice in Wonderland collection, my son has already asked if he can wear them to school when the show is over at the textile collective (success!).

Originally, I had ambitiously planned a Tweedle Dee/Tweedle Dum look for Boy's Week which included turning sweatpants into tailored, but comfy pinstriped shorts.  However, that was before I took a full-time job at our local elementary school and had to frantically sew during my "spare time" on the weekends.  I do still want to try it, but will probably wait until shorts weather makes its appearance in the Pacific Northwest again, which, realistically is July 2013.

After being met with such enthusiasm for this outfit by my son (don't let the goofy facial expressions fool you) I would like to try something else.  I look forward to being inspired by the designers and other sew-alongers this week.  What's your favorite sewing project for a boy?

Wednesday, September 26, 2012

Just Sew: White Sheet Challenge

Week Three of Project Run and Play challenges everyone to create an outfit using a white sheet.  My sketch for this came pretty quickly.  I knew I wanted to use polka dots and stripes, and had hoped to employ resist dye techniques (for the first time) to get them.  Unfortunately, it did not seem like the results would come out as crisp as I would like, so I resorted to painting the fabric instead.  By utilizing tips I picked up on HGTV about painting designs on walls (tutorial found here) I got the really clean patterns I was hoping for.

This look's second life will be The White Rabbit when I show my Alice in Wonderland collection next week (!!!!) during the First Friday Gallery Cruise.  I was inspired by the classic John Tenniel illustration above for the color scheme and the collar detail.  I also ended up adding a little seam detail in the front inspired by Handmade Martini's Macaron Dress that seemed to be everywhere this last month.  I am so happy with how this outfit came out and cannot wait to add the finishing touches to transform it next week.

Tuesday, September 25, 2012

Just Bake: Weekly Bagels


Last week, when talking about reducing the amount of plastic that comes into our home, I mentioned I make bagels from scratch every week instead of using store bought bagels packaged in plastic.  There were a few comments and requests about that process and recipe, and it seems appropriate to write a post it.
First off, the back story has nothing to do with plastic.  Two years ago, my kids decided they like having bagel sandwiches in their packed lunches for school.  What goes on the bagels varies, but they'd rather have it on bagels than bread.  Our grocery store does not carry organic bagels, and I don't leave the island frequently enough to buy a weekly supply of organic bagels somewhere else.  For a little while, our local organic bakery was making a custom order for us, but sometimes they would forget, or would comment on how labor intensive making bagels can be.  Also, that was an expensive option.  So, I decided to look up recipes and to try it for myself.  It turned out to be pretty easy (I'm not sure what they were complaining about at the bakery) and is part of our weekly routine.
I am probably closing in on my hundredth batch of bagels (I don't always make them during the summer) and have tweaked and merged recipes to come up with the most reliable results week after week.  The ingredients are:
          5 1/2 cups of flour
          2 1/4 tsp. yeast (or 1 package)
          1 Tbsp. salt
          2 1/3 cups of hot water
          1/3 cup of honey or sugar
Mix together the dry ingredients first.  In the beginning I used to heat up the water a bit in the microwave, but now I just use the hottest water I can get from our tap (ours runs about blank degrees - our youngest is nine, so we don't have to be as careful anymore).  After you add the water you can add the honey or sugar.  Knead the dough for five minutes.  It should be pretty smooth and elastic and just the tiniest bit wet when it is ready.  Let the dough rest as a ball for ten minutes.  Divide the ball into pieces (12 for regular size bagels/18 for minis).  Roll each piece into a snake and then shape into a circle and pinch the ends together.  Place on a baking tray lined with parchment paper and cover with plastic (I cut up a bag from all of the packaging I save to reuse).  
At this point you are going to proof the dough in your refrigerator for about eight hours.  I make and shape our dough on Sunday night and then boil and bake them Monday morning before school.  You could also make your dough in the morning and bake them in the evening.  Pull your dough out of the fridge and boil a pot of water.  Also, set your oven to 450 degrees.  Drop your bagels a few at a time into the boiling water and cover with the lid.  They should float right away.  If they sink, be sure to move them off the bottom of the pot so they don't get stuck to it.  Boil them for two or three minutes on one side and then flip to the other for another two or three minutes.  Remove and set on a cooling rack.  (If you are adding toppings like poppy or sesame seeds, you would press your bagels into a bowl of them now).  
After the last set of bagels have been boiled, transfer all of the bagels back to the baking sheet lined with parchment paper.  Put them in the oven to bake for ten minutes.  I also throw and handful of ice cubes into the bottom of the oven when I first put them in.  Flip all of the bagels and bake for another ten minutes.  Your bagels will be a nice, shiny golden brown when you pull them out.
Like I said, the original decision had nothing to do with plastic, but now I see, in order to avoid bringing more plastic into our home each week, we will have to make more of our staples from scratch. I am probably going to tackle yogurt or cream cheese next month and would love any tried and true tips on that.


Monday, September 17, 2012

Just Sew: Pretty in Pink

 When Project Run and Play announced their themes for each week, I immediately started sketching ideas.  After briefly considering Audrey Hepburn for the second week's challenge of Fashion Icon, and then moving on because I thought everyone will choose Audrey Hepburn (but now I wonder if no one will because we all went through the same process?), I started listing the traits I value in fashion.  I certainly appreciate vintage pieces and other secondhand items, as well as, when someone exhibits creativity and repurposes one piece of clothing into something else.  This significantly narrowed the field, when suddenly my fashion icon hit me:  Molly Ringwald's character from Pretty in Pink, Andie Walsh.  Aside from Maria making playclothes from curtains in Sound of Music, the construction of Andie's prom dress has to be the most iconic upcycling scene caught on film.  Plus, Andie and Duckie Dale made wearing thrift store clothing look pretty cool, when everyone else was buying matching outfits at the mall.
Although this movie came out the year before I was in high school (and my parents would not let me see it in the movie theater due to its questionable language), it quickly became a staple at most slumber parties.  Our family was planted pretty firmly in the middle class, but I did identify with the frustration of not fitting in (or even caring to) with mainstream high school culture.  By my sophomore year I was buying clothes at thrift stores and raiding my dad's closet for suit vests and cardigans.  I also had a pretty great hat collection.
To recreate Andie Walsh's style I converted a sweatshirt into a blazer (tutorial found in this post).and paired it with a vest repurposed from a flowery woman's blouse, and a simple jersey skirt made from the bottom half of a black t-shirt.  The hat was a score from one of our favorite consignment shops and I just added leftover fabric from the blouse to wrap around the band.  
But my most favorite detail of this outfit is the embellishment on the blazer made from doilies.  The jacket seemed a little plain, but I wasn't sure what to add, wavering between an embroidered crest or some tapestry.  Then after watching the movie for easily the first time in twenty years the answer was obvious.  In the opening scene there is a shot of Andie's bedroom and there are doilies everywhere, on the bedspread, her vanity, and in the details of her clothes.  A quick run to the antique store (half off at $2.47) and a dunk in some pink dye made the perfect final accessory to this look.  I actually cut the center piece out of a large doily and gathered the edges together yo-yo style to add a little dimension.
It turns out the DVD for this movie has a lot of great Extra Features, including a section interviewing the actors and the costume designer about the wardrobe.  They had footage from the time the movie was filmed, as well as, some more recent interviews with everyone.  I was already impressed with how well the film has held up after all of these years and felt both Andie Walsh's outfits and Ducky Dale's looks were pretty timeless.  But then both Molly Ringwald and Jon Cryer talked about how they were allowed to keep certain items from the movie and how they still wear them to this day, which just confirmed:  the best fashion advice is to find the style that really represents you. Use classic, well-made pieces to express yourself, customizing them by swapping out buttons or adding doilies, even, as long as it says "This is who I am" to everybody else.


Just Make: Painted Fabric Tips

 Next week's Project Run and Play challenge requires working with a white sheet.  Since everything I am sewing for this season will be part of our community's First Friday Gallery Cruise in October, I feel like each look is part of a "collection."  The theme of this collection is costumes representing characters from Alice in Wonderland.  The colors I am using are very bright and I am trying to mix and match a lot of polka dots and stripes.  After researching  a few techniques for getting stripes on fabric (resist dye, freehand painting) I decided to use a tip I saw on HGTV at one point and treat my fabric like painting stripes on a wall.

The first thing I did was iron the fabric to create a smoother surface.  I picked up this sheet at a thrift store a few weeks ago and it has been sitting, folded up on my sewing desk since then.  I wish I had been more aggressive about ironing, because any imperfections I had were definitely caused by wrinkles.  Next, I measured and taped off my stripes with blue painters tape.  I wanted the stripes to be pretty wide, so I put two strips overlapping to create about three inch stripes.  This is where the HGTV tip comes in.  Instead of just painting all over the fabric, "dry brush" paint the edges of the tape where it meets the fabric.  This means only put a small amount of paint on your brush,

and then, starting with your brush on the tape, paint onto the edges of the fabric along the tape.  The theory is, this prevents excess paint from seeping under the tape onto the fabric (or wall), and instead creates a nice, crisp line of paint.  Once the paint is dry where you dry brushed you can go back over and paint the entire fabric.  After this coat dries, you can peel the tape and admire your nice clean lines.  I was really pleased with the stripes, and my neighbor didn't even realize the fabric had been painted when I was trying the skirt on her daughter, so I count that as a success.  Tune in next week to see the fabric in Week 3's look for Project Run and Play!


Saturday, September 15, 2012

Just Read: Plastic Free

A few years ago I decided to stop buying ziplock bags to use in my kids' lunches.  We invested in some sturdy re-useable containers and also started rinsing out and saving bags when purchased items happened to come packaged in them in case we needed them.  In comparison to Beth Terry's declaration in 2007 to not allow any new plastic to come into her household, our decision seems rather small.  But as I read her book Plastic Free:  How I Kicked the Plastic Habit and How You Can Too I learned a plastic free life is only attainable through small steps like ours.

Even though the goal of this book seems daunting, Terry's story is very encouraging.  Prior to 2007 she led a very disposable and plastic lifestyle: eating take-out daily, drinking multiple cups of coffee a day - all from styrofoam cups with plastic lids, and accumulating CDs, DVDs, craft supplies, and sporting goods manufactured  from plastic.  If she got to plastic-free from that, surely our somewhat conscientious family can make this journey, too! 

By tackling the various areas of our lives most infused with plastic (food packaging, personal hygiene products, cleaning products) in different chapters of the book and providing feasible solutions and resources for each, Terry does make this goal seem attainable.  Packed with references to other books and websites, as well as, profiles of Plastic Free Heroes the reader will find the answer to any situation that involves plastic.

Since reading this book, I have of course, become more aware of the pervasiveness of plastic in our lives.  And although we have been using stainless water bottles for years and buying most of our items secondhand and even baking bagels from scratch for packed lunches (which means we don't bring in a new plastic bag every week from the grocery store) our family still has a long way to go to eliminate bringing new plastic items into our household.

My goal is to focus on one area each month and eliminate that source of plastic.  After doing it consistently it should become a habit and allow me to move onto a new area.  An easy goal for October will be a consistent commitment to re-using plastic bags for produce rather than using the ones that are provided in the grocery store.  We already use cloth bags for our grocery shopping, and I just need to devise a system that makes it easier to store and take bags for produce to the store.  It is something I have been saying I will do for months, and it will feel good to finally do it.  Trickier goals will definitely be making other perishable items from scratch weekly that contribute to our ever growing collection of plastic food containers stored in the cabinet to the left of our dishwasher:  yogurt, cream cheese, salsa, hummus, etc.  You can bet I will look at recipes and choose the easiest first! 

I know this will be a process for our family, and even Terry admits she gets in tough situations where it seems like plastic is unavoidable.  Right now, I am sure there are areas we can easily improve and whatever habits we incorporate will be better than how we are doing things currently.  Throughout her book Terry frequently reminds the reader she is not perfect and that this is a journey, I am just thankful she blazed the trail and we can use her experience as our own road map.  What are some ways you avoid/reduce plastic in your life?

Sunday, September 9, 2012

Just Sew: Bias Strip Romper


It was only this past spring that I stumbled on Project Run and Play and was instantly hooked.  Although we don't watch T.V. in the traditional sense in our house, we do keep up with a few shows online.  Despite the over-produced drama, I am pretty fascinated with Project Runway.  I love the idea of the challenge of creating something within specific parameters, and when they take the time to show it, I do get inspired by some of the design elements and sewing techniques.  I do occasionally do some sewing for adults, but I predominantly sew clothing for children, and I often found myself hoping there would be a spin-off focused on the children's industry.  So, the more I read about Project Run and Play and how it was pretty much what I had been hoping for, the more I got drawn in.

Unlike Project Runway, there is a sew-along option for the folks "watching" from home, and I was able to create something for four out of the six weeks.  Then I got caught up in sewing costumes for my daughters' dance production and wasn't able to finish the last two looks.  This "season" I have managed to plan ahead, and am hoping that even if something unexpected comes along, I'll be far enough ahead to compensate.  That's the plan anyway...

The challenge for the first week is a pattern remix, using No Big Dill's Very Biased Skirt tutorial.  Everything I sew is made from secondhand fabric or clothing, so of course, I started with a pile of t-shirts.  I should add here that all of my Project Run and Play entries will end up doing double duty for an art display in October.  Each month our local fiber and textile arts collective features one of its members for our community's First Friday Gallery Cruise, and many months ago I volunteered for October.  Inspired by Halloween, I am sewing costumes representing characters from Alice in Wonderland.  This romper will eventually be part of the Cheshire Cat's look - hence the pink and purple stripes.
After cutting out two rectangles 25% larger than the waist measurement, and with a one inch allowance at the shoulder, I began the process of cutting the printed t-shirts on the bias into strips.  This is where I began to feel like a real Project Runway contestant.  The amount and type of labor involved in cutting enough strips was really out of my comfort zone when it comes to sewing.  I could spend the same amount of time hand-embroidering something and never complain, but repetitively cutting strips - no thanks.
Once the strips were cut, I pinned and sewed them onto the rectangles, essentially creating my own fabric.  Before putting the right sides together, I took the time to pin down the loose ends of each strip so I didn't accidentally sew a strip into a wonky position while sewing up the side seams.

Now it is time to pin up both side seams (leaving a few inches for the armholes) and across the shoulders (leaving and opening for the head).  Although I was mindful to leave the opening for the head a little wider than necessary, I completely spaced out on the part about leaving the legs open after cutting the inseam (three inches for an 18 month old).  So, yes, I pinned (and sewed!!!!) the inseam before trying this on my future Cheshire Cat model.  I did not sew much when my kids were this young, and I seem to have forgotten how an article of clothing like this would work.  You should leave the inseam open and only pin and sew the sides and shoulders at this point.  I also finished up the exposed edges around the neck, arms, and legs while I was at my machine.  Luckily, I had a onesie on hand to borrow snaps from and sewed those into the inseam.
It was a chilly evening, but my neighbor's little girl was wearing a long sleeve shirt that coordinated perfectly.  This will work well for the Cheshire Cat, as our Alice in Wonderland shoot is slated for the first week of October, which can be pretty unpredictable in the Pacific Northwest.  All in all, I do love the combination of the colors and prints, but will probably do a fun applique on my next romper.  I do feel like I was pushed in this challenge, but would definitely only use this technique for a special occasion outfit.  What technique do you use when you are creating something special?


Friday, September 7, 2012

Just Listen: This Man Makes Beautiful Suits

My husband and I have been fortunate enough to find jobs on the island where we live, which means we do not have to deal with the headaches of commuting by ferry to the mainland, and then driving in gridlock to get to work.  Except for this week.  I have recently taken a new job in our school district and had to complete training in Olympia every day this week.  The commute works out to about a three and a half hour round trip.  I. can't. believe. there. are. people. who. do. this. on. a. daily. basis.

However, ever the optimist, I have searched for the silver lining in my situation this week:  1) I got to explore a city I had never visited before during lunchbreaks, 2) I finished knitting a hat for my soon to be adopted nephew while riding the ferry, and 3) I had lots of uninterrupted time to listen to NPR.  Usually, I am lucky if I can squeeze in two hours a week of NPR, and even then it is always broken up by the short people in my house requesting my assistance in one way or another.

This morning during Planet Money, of all features, they played an interview with Peter Frew, a tailor in New York City who hand-sews custom made suits.  Even though Frew's suits are certainly a luxury item, retailing between four and five thousand dollars each, he himself does not make more than fifty thousand a year (which is stretched thin in an expensive city) and could never afford to buy one of his own suits.  Frew confessed he cannot even afford to take the time to make himself a suit (much like my organic farmer friends who cannot afford to eat their own produce).

I appreciated that the interview certainly gave the listener a better understanding of what goes into handmade goods, and provided the perspective that although the final product may have a large price tag, the artisan is not getting rich off of the sale.  When asked why he doesn't go into some other business, Frew replies he still gets a lot of satisfaction from every suit he makes, and at the end of the day, he just loves what he does - a very inspiring answer for us all.

Thursday, August 30, 2012

Just Sew: Sweatshirt Blazer


Having taken a new job at our local elementary school, I decided to get a jump on some of my Project Run and Play pieces.  All of these, in turn, will be altered and used for our community's First Friday Gallery Cruise in October, when I am our textile collective's featured artist.  There will be more detailed posts about both of these events when the time comes, but for now, here is the tutorial on transforming a sweatshirt into a comfy and pretty blazer.  Working with a sweatshirt that fits comfortably, cut off the cuffs, bottom band, and collar.  Find the center of the neckline and cut the sweatshirt in half up the front.
Trace a lapel from another jacket, or freehand a pattern from newspaper and pin it on to see if you like the size.  Once you are satisfied with the proportions of the lapel, pin, trace, and cut them from the sweatshirt.  Because I wanted my lapels when flipped to be the heathery grey fabric and not the fleece, I had to play with which side to trace where.  In the end, I labeled the wrong side (fleece) with a W and traced the straight edge of the left lapel with the straight edge of the right front half of the blazer and then vice versa.  Miraculously, I cut them both correctly.
There was the smallest triangular scrap left in the neckline after I cut the lapels.  I just held a ruler following the angles of the edges of the right and left sides and cut all the way up to the shoulder seams.  Next I finished all of the edges around the cuffs, collar and the bottom.  Because this is for a more feminine project, I stretched the fabric to give it a lettuce edge.  You could certainly finish it with a straighter stitch or even piping to make it more masculine.
To attach the lapels, I rolled the unfinished edge and pinned it in place on top of the sweatshirt.  I then stitched over all three layers so the lapel would be flipped over the way I wanted on the blazer.
 I am very excited to combine this blazer with some other pieces and accessories for submission during the second week of Project Run and Play.  After that it will be dyed and embellished and begin its next incarnation, hardly recognizable from its lowly, plain grey sweatshirt beginnings.

Just Eat: Ben & Jerry's Ice Cream

In 2010 Ben & Jerry's Ice Cream announced they were working towards using only Fair Trade Certified ingredients in their products by 2013. Longtime supporters of local farms and non-BGH dairy products, the founders always felt uneasy about the origins of their more exotic ingredients of vanilla, coffee, and cocoa, three industries which frequently use forced, and even child labor.  In a press announcement Jerry Greenfield said, "Fair trade is about making sure people get their fair share of the pie. The whole concept of fair trade goes to the heart of our values and the sense of right and wrong.  Nobody wants to buy something that was made by exploiting someone else."

Although Ben & Jerry's is definitely priced as a premium ice cream, our family accepts that we are paying for fair wages for their US employees, as well as, those abroad.  Also, it makes having ice cream a special treat, as opposed to a standard nightly dessert, which is definitely instilling healthy habits and attitudes in our kids.

Forced labor and especially child labor are really tough topics, and most of us want to believe it isn't that much of a problem anymore, but the reality is in 2012 over 21 million people worldwide are being exploited in forced labor situations and a quarter of those people are children (according to the United Nations' International Labour Organization's latest study).  But limiting our consumption of products that typically use forced labor and choosing fair trade when we do buy them is one step towards a solution. 

Friday, August 24, 2012

Just Read: Get Real


When I discovered this book I was both an independent bookseller and a fledgling passionate ethical consumer..  And yet, I found it hiding under some picture books at a Scholastic book fair at my kids' elementary school.  How had I missed this book?!  I bought it immediately and began stocking it for our bookstore.

Mara Rockliff has written a variety of books for young people, and I really appreciate her clear and concise way of addressing the huge topic of ethical consumerism.  The first quarter of the book introduces the reader to the concepts of True Cost, Western consumption habits, and advertising schemes.  The bulk of the book breaks down the issues around production, transportation, consumption, and disposal of individual industries like textiles, fast food, electronics, plastics, and chocolate.  The last quarter of the book is devoted to strategies and examples of points of action the reader can take, whether it is pledging to buy fair trade coffee or joining an international movement.

The layout of this book keeps all of the information in very digestible chunks and is very stimulating.  It also serves to break up some of the more somber statistics with bright graphics.  I used this book as one of my resources when teaching a class on consumerism and upcycling to middle schoolers and granted them permission to make the "Debbie Downer" sound effect (mwah - mwah) when the information got too depressing or overwhelming.  Despite exposing these heavy issues, Rockliff still manages to keep the tone of the book positive, assuring the reader he or she can make a difference.  The blurb on the back of the book says it best:
     Can you really change the world with your wallet?  You already do.  Buy a pair of sneakers, and where does your money really go? Order a cheeseburger at a drive-up window, and what are you really buying?  Spend your birthday money on a cell phone or a video game, and what are you really getting?  Ask yourself this:  Who made it?  What's in it?  What's it doing to the earth, other people, and me?  Start seeing the world for real - and discover how you can make a difference.  You've got buying power - now let's see you change the world for good!

Although Get Real: What Kind of World Are You Buying? is geared towards kids, there is enough content to make it interesting and inspiring for adults, too.  It would be a great book for a family to read together and then set mini-goals to begin changing buying habits.  How does your family try to make a difference with your dollar?

Wednesday, August 22, 2012

Just Sew: Wrap-Around Circle Skirt


Earlier this summer, I made a similar skirt for Skirting the Issue over at Project Run and Play.  My youngest was my model and she really loved how comfortable it was and the mushroom appliques.  Because I sew primarily from thrifted materials, my final products are often one-of-a-kind and tough to duplicate.  Luckily, I made the original skirt from a large stash of turquoise jersey someone donated to our local thrift store, and had enough leftover to make her a skirt, too.


I began with a standard circle skirt using the tutorial at Made.  Since this is for a young girl, I like the coverage, shape, and fullness a circle skirt gives, as opposed to using a long, rectangular shape if I were making a wrap-around skirt for myself.  Once I had the fabric cut, I made an additional cut from the bottom of the skirt to the top in just one section.  At this point I began the tedious task of finishing all of the edges.  You could use a serger or a zig-zag stitch to do this.  If you are using a jersey knit you can also leave the edges unfinished, if you like that look.


The next step involved wrapping the skirt around my daughter's waist and marking where a hook and eye closure would go inside the skirt (on the right in the picture) and where the buttons and elastic loop would go on the outside of the skirt (on the left in the picture).  I just placed paper clips in each of these spots, but you could use pins or chalk or an erasable fabric marker.


The concept for the visible closure uses two buttons and a colorful elastic hair band (we have all graduated to boring black around here).  This allows some flexibility when wrapping because you can double or triple wrap the hair band around the button to make the skirt tighter.  I hand sewed the hair band to the skirt and then positioned the button over it so each hole was on either side of the hair band.  This keeps it very secure and hides where you had to sew the band to the skirt.  I then sewed the second button onto the skirt where I had placed the paper clip.


Lastly, I added the mushroom appliques to give it a little personality.  My youngest is very happy with this skirt and is currently planning on wearing it on the first day of school. 

Sunday, August 19, 2012

Just Use: Handwoven Towels


It is a rare occasion that I purchase a new textile product.  Knowing the excess that occurs at all stages when it comes to producing textiles, buying secondhand feels like a stop gap (albeit a tiny one) in that cycle.  However, the dish towels people donate to places like Goodwill are either often a) very worn or b) very ugly.  After several years of settling for un-absorbent and unattractive kitchen towels, I decided to invest in some quality, handwoven organic cotton ones.

Reader, (I've been re-reading Jane Eyre lately) I will never go back!  The difference is a hundredfold.  Just by touch you can tell the item will hold up to a lot of use and will last a long time.  The longevity of a product's lifetime justifies purchasing new.  I think I  found my new go to present when it comes to weddings.

I used the term "invest" when I described my decision, because an individual towel can run between twenty and thirty dollars, but a set of three is likely to last ten years or more and is not contributing any textile waste to landfills.  Also, you are getting something very practical and supporting a local artisan.  While I purchased my towels from the fiber arts and textile collective where I am a member, there are many weavers listed on etsy or to be found locally