Learn. Choose. Change.

I pledge to learn the true cost, to people and the planet, of what I eat, wear, drive, use and do every day. I choose to consume justly and to increasingly change my habits.

Sunday, January 27, 2013

Just Sew: Hooded Scarf

The theme for this week's challenge at Project Run and Play is Valentine's Day.  It is not a day I usually put a lot of effort into, except to help our kids make cards for their classmates each year.  At first I was worried I would only be able to come up with cutesy ideas for my look, and while the above picture is certainly cute, the humor helps it veer away from cutesy.
The hooded scarf is actually a great project for a beginning sewer.  I have taught sewing classes for kids, and this is always a successful activity.  These scarves both began as long sleeved shirts.  I was able to use some shiny scrap fabric and foam to make the horn and antennae.
Cut straight across the shirt at the armpits.  The lower portion will become the hood, and the neck and sleeves will function as the scarf.
Fold the lower portion of the shirt in half, taking care to line up the bottom hem and smoothing out wrinkles.  A lot of mass produced shirts are put together a little wonky, so this takes special attention sometimes.  This gives the hood a double thickness, which makes it lay nicely on your head, and is really cozy.  The bottom hem will be the edge of the hood, framing your face.  (If you make this with kids, you could always cut the shirt at the side seams and forego the two ply version so it is easier to sew through).

After you pin and sew your hood (right sides together) and then flip it right side out,  pin the hood to the inside of the neckline of the shirt.  I like to center it above the label first and work my way out to the edges.  The bottom edge of the top portion can be flipped inside out and pinned right sides together and sewn at this point, too.  Now attach the hood to the neck, and you are done!  This is an extremely versatile pattern that can be customized into just about anything.  I also added a bias trim made from other t-shirts to make these a little more special.
I am just so happy with how these turned out.  The little boy in the picture with my daughter is a close family friend and I have been wanting to sew something for both of them for a while.  I had actually planned on a Tweedle Dee and Tweedle Dum look for my Alice collection last fall (it was going to be my PR&P Boy's Week last season, too), but was too overwhelmed with my new job to get it done.  They are the same age and often get asked if they are twins.  They even both got glasses in first grade.  Despite a makeshift shoot in the garage (raining in the Pacific Northwest again, go figure), dead camera batteries, and switching to an iPhone midway, they were pretty cooperative...until I asked them to hold hands.  I am not ashamed to admit I stooped to bribing, and will be taking them out for ice cream after school this week.


Saturday, January 26, 2013

Just Dance: One Billion Rising

Living in America it is very easy to take for granted the opportunities available to me and my daughters.  Because we have access to education and fair wages, we forget that even in the 21st century, this is still not the case for many women and girls across the globe.  One Billion Rising is a movement to raise awareness around women's issues.  One trendy strategy they are using is worldwide flash mob demonstrations scheduled to take place on Valentine's Day.  Each location will take footage and it will be edited together into, what I am sure will be, a very moving video of women from just about every culture standing up for each other.

Now, even though both of my daughters have been dancing for several years, I am not a dancer.  And the type of dancing required for the flash mob is probably my least favorite style of dancing (it has a world funk/zumba feel to it).  HOWEVER, I felt like this was a great opportunity to talk to my daughters more about struggles girls their age face in other countries and to show them how they can use dance to make a statement.

We attended our first rehearsal this afternoon and there were 40 to 50 of us aged 8 to 68.  Yes, I was totally outside of my comfort zone as I tried to follow the steps, but as the song built to the end and culminated with everyone pointing to the sky, I have to admit, I got a little choked up.  Many ages and backgrounds were represented in just our small room, and I imagined the actual event uniting us all across so many different boundaries.

Our community is staging our flash mob mid-afternoon on Valentine's Day.  Many are planning on joining a bigger mob in Seattle that evening, which is expected to draw thousands of participants.  And though some might ask what a flash mob accomplishes, I can say it has already been effective in our household, establishing connections, sparking conversations and exploring actions we can take to make a difference. 

Tuesday, January 22, 2013

Just Make: Mini Memory Cards

Over the holidays we had an impromptu dinner with our neighbors and my youngest worked all afternoon on a felt snake toy for their daughter (complete with handsewn sequins).  About thirty minutes before they were set to arrive, I realized we should have a little gift for their son, too.  Like a lot of five year old boys, he is really into Legos right now.  We still have quite a collection of Lego magazines and catalogs from when our kids were younger, and I thought we could whip something up out of those.  The kids and I flipped through the pages looking for pictures featuring the same minifigure.  
We then cut them out and attached the pictures with doublestick tape to some playing cards from an incomplete deck.  In keeping with the mini-theme we cut the cards small, too, calling it a Mini Memory set.  Of course, this would work with pictures from any magazine or catalog (Playmobil and American Girl come to mind) and the cards could be kept full size.  It was definitely a quick craft for a quick fix!

Monday, January 21, 2013

Just Sew: Boy's Week


This is my son's second year participating in our local Ski Bus program.  It's a great deal providing transportation, chaperones, and buddies over a two month period where he gets to snowboard every weekend.  Last winter we bought his equipment and outerwear for Christmas and scrounged whatever we had on hand to layer underneath.  Luckily everything still works for this season, but he did have a few requests.
After seeing this hat and beard in a catalog, he asked if I could make something like this for him with a hat he already owns.  I simply measured his face and drew the beard design freehand to create a pattern.  I then cut two layers out of a thrifted brown sweater and sewed them together.  Finally, I sewed buttons into the inside of his hat to attach his new beard.  He likes that it is custom made for him and that he can easily remove the beard from his hat.
His second request was for a new pair of leggings to wear under his 
snowboarding pants.  (He may or may not have been subjected to wearing his sister's leggings last year).  I found a pair of men's sporty pants that are lined with a light fleece on the inside, but have a thicker, kind of polyester (more water resistant?) fabric on the outside.  Using his sister's leggings I traced out the pattern for his pair.  I unintentionally lined up the existing seams so they go straight down the middle of his legs from the front.  My husband likes the rockstar quality they give the pants.
While he actually already has a good thermal shirt to wear under his sweatshirt and snowboarding jacket, I did offer to make him another one since I was try to create an entire look for Project Run and Play, anyway.  Unsurprisingly, we don't give a lot of thought to name brand clothing around our house.  However, skateboarding brands are a little different, as you are often showing your allegiance to a certain skater by wearing their company or team's logo.  So far, my son takes into account a skateboarder's personality just as much as his ability.  The logo on the left is for the company Fallen, which was started by Jamie Thomas, who has proven to be a pretty good role model (married, three kids, clean living).  After sizing down a men's thermal, I used the scraps to create the Fallen logo.  Originally, I was going to use a contrasting color, but I am a lot happier with the grey on grey here.
Like most people sewing for kids, I find making something for the boy to be a lot more challenging than for his two sisters.  He will be twelve this summer and I am keenly aware of how uncool something can be if your mom made it.  Amazingly, when I asked him if he felt weird wearing something homemade, he said, no, he liked that it was made just for him.  Pretty cool kid.  Maybe he'll be someone's role model someday.

Thursday, January 17, 2013

Just Sew: Dots and Stripes

Between Munchkin costumes for a spring production of Wizard of Oz and outfits for my Alice in Wonderland collection last fall, I sewed almost 20 outfits featuring polka dots and stripes in 2012.  And while I really do love polka dots and stripes (I even wore them together in my senior picture) I feel a little tapped out in that category when it comes to sewing right now.  This was definitely the vaguest of my sketches when I planned out my looks for Project Run and Play.  Luckily, my youngest came through with some requests and I suddenly felt inspired.
I went back to my old friend, jersey knit, to create this comfy outfit.  All of the pieces are made from thrifted t-shirts and scraps.  Being the youngest of three, my daughter has spent her life catching up to big brother and big sister, only to emerge as the most competitive member of our family.  She is always up for a quick card game or a race to the next destination or a game of rock-paper-scissors when we are waiting for the ferry.  At some point she saw a cute shirt with a rock-paper-scissors design and asked if I could make one for her.  I really enjoyed embroidering a scrap of white t-shirt into the cutest piece of paper.  I kind of wanted to keep it for myself because it turned out so fun.  One of my students said, "It's so cute!  I just can't stop looking at it" and, I have to admit, I feel the same way.  Anyway, each piece was embroidered and appliqued onto a t-shirt.  I paired the shirt with a polka-dot ruffled scarf, made from a super soft thrifted t-shirt.
Lastly, I made these wrist warmers from one striped and one polka dotted shirt.  (You can barely see the polka dots in the shot, but the whole palms down side is that material).  They looked a little plain, and I already had my embroidery thread out, so I started stitching some colorful dots and stripes into the fabric.  I kept it really minimalistic and I am digging the Eighties vibe from the color combinations and design.  I just might have to borrow them...

A lot of what I have sewn in the past has actually been for costumes or custom orders or for presents and rarely for my own kids.  One goal I have this year is to sew a lot more for my own family (this does include window treatments for our living room).  My daughter was so thrilled I made a shirt just for her that she got to wear to school right after the photos were done.  Even though I wasn't that excited about this challenge, I really like how these pieces turned out and foresee all of them getting lots of wear by all the girls in our family.

Monday, January 14, 2013

Just Eat: Local Eggs

Even though I grew up in a city, I have always been drawn to the country lifestyle.  Since I graduated from high school, I have lived the majority of my adult life in towns with less than 12,000 people.  In 2011 we finally bought a house on our little island, and although it is in a neighborhood, our community shares three and a half acres with a neighboring co-housing community that can be used for gardening and keeping animals.  This allows us to keep chickens, but share in the responsibility with four other families.  Although I anticipated enjoying sharing the experience with my children, I underestimated the personal satisfaction I would feel in raising and caring for these creatures.  There is a certain bliss after I have cleaned out the hen house, maybe moved the fence to a fresh grassy spot, and tossed around some extra scraps for everyone to enjoy.  I totally did not expect to feel like that about some birds.  

Also, and Martha Stewart has been saying this for years, fresh eggs taste really great.  You can seriously see the difference as soon as you crack them.  The yolk is twenty times more yellow than commercially raised eggs, as is the intensity of the flavor.  It has given me great pleasure to pass on some extra eggs each week to one of our elderly neighbors who always raised chickens herself, but now is not physically able to.  She had just stopped eating eggs altogether because store bought eggs tasted so bland and rubbery to her after decades of eating fresh.
I know not everyone is in a spot to keep their own chickens, but you might be able to find someone nearby who can. The website Local Harvest is a good place to start.  Most cities in our area actually allow people to keep three or four birds in their backyards.  I used to buy eggs from a local/cage-free/organic egg business.  And while I know the situation of those birds is better than being literally chained to a perch with their beaks removed while they are fed intravenously (the situation for the majority of factory farmed chickens), the above picture is still a little disconcerting to me.  It is actually from an article praising the aforementioned local egg business for their practices.  But after spending the last year around chickens, I know this situation is not ideal.  My goal this year is to move more towards consuming animal products either from animals that I have raised or that I actually know and trust the person who raised them.  It is a lofty goal, and I know we won't always be able to do it, but any purchases we do make this way will feel pretty good.

Thursday, January 10, 2013

Just Read: The Happiness Project

Back in 2009, when this book came out, I was still the owner of an independent bookstore.  Most of my customers were fairly discriminating readers, and I, myself, could be a little snobby about books.  So, when Gretchen Rubin wrote The Happiness Project, I dismissed it as another self-help book full of fluff.  However, a customer with good taste in reading came in one day raving about this book.  Trusting her instincts, I ordered some copies for the store and read one for myself.  Now, just about every book club on the island has read and discussed this book, and everyone I've talked to has gleaned something from it.

What makes this book stand apart from others like it is Rubin's background.  She has a law degree (from Yale, no less) and has researched and written biographies on political figures like Winston Churchill and John F. Kennedy.  Where other books in this category might be light and feel like just a lot of common sense, Rubin has done her homework and provides loads of scientific research for her project.  She also tackles her goals systematically, dividing them up into categories and setting deadlines.  This type of organization and approach appeals to me, as I love to make a list and cross things off.

So, what does this book have to do with this blog?  The focus of the first chapter/month is Boosting Energy.  Rubin concludes from her research that physical clutter was weighing her down and dealing with it daily was sapping her energy.  I like the way she addresses different categories of clutter:  Sentimental, Bargain, Freebie, etc.  She acknowledges the way we tend to value stuff and justify its existence in our lives.  Also, after dealing with her clutter, she is much more conscientious about what she is going to bring into her home.  This is the part that rang true for me.  After making a decision to consume more conscientiously, our family evaluates everything coming into our home (clothing, appliances, gadgets, etc.) whether we will be purchasing it new, second-hand, or getting it for free!  Even our kids will stop and question if they really need something before deciding to purchase it or accept a hand-me-down from a friend.

Rubin also discusses the value she began to place on experiencing things rather than consuming things throughout her experiment.  This is a value we have also tried to instill in our family, often giving experiences (trips to museums, dance performances, skateboard competitions) as gifts, rather than things.  When our kids were younger, we often requested Family Memberships to the local zoo and children's museum as Christmas presents, rather than making lists of items the kids could receive from grandparents.

As it is the New Year (sort of still, right?), this is a great read to get you motivated to make some changes that have probably been nagging you for awhile anyway.  And though you may feel you are getting a late start (the chapters are divided by months), you'll find some chapters are inappropriate or unnecessary to your life anyway.  For example, Rubin devotes a month to her career and many of us are not in a spot where we are thinking about that.  She also spends another month exploring her spirituality, another topic many people already feel they have a pretty solid footing in.  So, in the end, anyone could pick and choose their own areas and set their goals accordingly.  Good Luck!


Sunday, January 6, 2013

Just Sew: Party Dress Remix

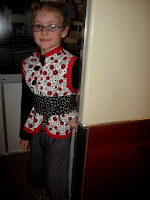
It is already time for another season of Project Run and Play.  Last fall, I successfully completed all of the challenges, although not to the level I had originally sketched out.  This season, my goal is to follow through on all of the elements I have planned.  The first challenge is a Pattern Remix of The Party Dress from Cottage Home.  There were two elements in the design that stood out to me and influenced my final product:  the looped button closures and the extra wide sash.  I immediately pictured the button loops on the front instead of the back, and the sash reminded me of an obi belt on a kimono.  The sketch I drew felt very Asian to me, and my youngest remarked it would be a perfect look for her upcoming Japanese unit in school.  I decided to only make a top, since she is really not into dresses right now and I want her to wear it more than just the one time for her class performance.

After searching various thrift stores for a fabric that read "Japanese" in some way, we kept coming up empty handed.  And so, I bought my first bit of new fabric for the first time in several years.  I still have mixed feelings about this purchase.  On the positive side: we bought it from our local, independently owned fabric store and it was used to make a well-constructed garment that will last through several children.  On the negative side (for me):  the fabric was not produced sustainably in any way and I feel badly about supporting an industry that does so much harm to the environment and exploited people groups.  It is probably a decision I will always feel conflicted about.  In the future, I will continue to look to recycling fabrics first, and will probably be more willing to compromise my vision and settle for a less desirable fabric.  Maybe.
Despite my feelings about the purchase, I really do love the prints my daughter chose.  We spent a lot of time with some cute Kokka fabrics, but most of the available bolts had too much pink.  Besides avoiding dresses, she is also into avoiding pink.  Just as we were about to reluctantly pull some fabric to be cut, she discovered a section we had somehow missed that was full of very traditional Asian prints.  I love that she picked a design with a white background, as it keeps everything lighter and younger looking.  I also knew I already had two vintage Bakelite buttons that had a similar shape to the red flowers in the fabric.
For the remix, I simply turned the bodice around to feature the closures in the front.  I also did a very simple "peplum-esque" bottom to turn the dress into a top.  For the sash/obi belt, I followed the concept of this tutorial, sizing it down to fit my daughter, of course.  The pants are basic drawstring pants made with leftover fabric from last season's white sheet challenge (the top is also lined with that fabric, as well).  She requested grey pants to match the small grey flowers, and they amazingly came out after the first batch of dye.  I used some of the scraps to create an origami butterfly for her hair, which, really, was a nice idea in theory, but did not translate well in real life, hence no close-up shots of that!  We are in the midst of a drizzly winter in the Pacific Northwest, so we took our photos inside of a Japanese subway car at the Seattle Children's Museum.  She was really happy with the look and looked pretty adorable in the Japanese section of the museum. 

Tuesday, January 1, 2013

Just Challenge: Project 333

Is it too predictable to write a post about getting organized, decluttering, etc. on New Year's Day?  Probably.  But I read about Project 333 awhile ago and have finally taken the plunge because it seemed pretty lame to not even let a New Year inspire me to action.  Also, as a happy bonus, my husband has jumped in as well.  You can read about the idea yourself, but the basic concept is to whittle your wardrobe down to 33 items and live with them for 3 months.  As I have mentioned before, I do not enjoy clothes shopping and do not struggle with hoarding clothes, so this idea was not particularly daunting for me.
Despite my conservative attitude towards clothes, our closet situation has been pretty tough.  Our house has three bedrooms upstairs and one bedroom downstairs.  The whole house is 1200 square feet, so each room is pretty small and storage space is limited.  We were uncomfortable with having any of our children sleep on the ground floor, so my husband and I have taken the small downstairs room for ourselves.  Its closet was not designed to be shared by two adults.
After taking a look at my wardrobe, I was surprised to see I really only wear about 28 items with any regularity anyway.  My outfits mostly consist of shirt + cardigan + skirt + leggings.  During the warmer months you can subtract the leggings and occasionally the cardigan.  In the end I kept 9 shirts, 5 skirts, 3 pairs of leggings, 1 pair of nice pants, 1 pair of jeans, 4 cardigans/jackets, 1 winter coat, 1 raincoat, 1 hat, 1 scarf, 5 pairs of shoes, and 1 bathing suit. My discarded items easily fit in a brown paper bag.  I do have 9 items in reserve to see how much I miss them over the next three months.  Several of them are a little more seasonal, so I may need to keep them bagged into the spring to really test their necessity.  Even still, if I add some back in, my entire wardrobe will probably be less than 40 items.  I love projects like these that challenge our Western ideals of necessities and hope to apply this concept to more areas of my life this year.

Just Sew: Ruffled Scarf

Last year while sewing Munchkin costumes for a production of Wizard of Oz, I discovered the versatility of elastic thread.  Ever since then I have been wanting to make ruffled scarves out of strips of t-shirts.  Of course, since it was a project for myself, it always got pushed to the back burner.  Our family was fortunate enough to have a very quiet holiday season that allowed quite a bit of down time for sewing, and I finally got around to this idea.  I made two scarves in less than thirty minutes, and I think this will become my "go to present" for 2013.
Obviously, you begin with a t-shirt in a color or pattern that you like.  I have been trying to incorporate more grey into my wardrobe, phasing out black as my default neutral, and am always a fan of polkadots.  
Cut the shirt into strips.  For my first scarf, I used strips that were around two inches wide from a relatively small t-shirt.  The scarf ended up being a little on the short side and didn't ruffle the way I envisioned (luckily my oldest daughter liked it, so it wasn't a total waste).  This shirt was also on the small side, and I knew I'd be compensating for some lost fabric due to the ruched seams towards the bottom, so I cut pretty skinny one inch strips.  
After attaching the strips together to make one long strip, I sewed with the elastic thread right down the middle.  Two things to remember when using elastic thread:   
1)  You only need to thread your bobbin with it, using regular thread through the top of your machine.  I actually didn't know that at first and spent quite a bit of time trying to thread my machine and needle with elastic thread.  It was one of those extremely frustrating sewing moments.  
2)  The thread will come off the bobbin more smoothly if you have wound it on by hand.  

As you can see, this process twists the fabric some, which was unexpected for me, but I really like it.  I look forward to experimenting with this technique more.